Overview
Questo articolo spiega come abilitare un bridge LAN in pfSense®. I bridge LAN fungono da switch utilizzando le porte opzionali. Sebbene non sia ottimale rispetto all’utilizzo di uno switch fisico separato, funziona se necessario.
Nota: se la porta utilizzata per l’interfaccia Web viene aggiunta al bridge, sarà necessario l’accesso fisico all’unità.
How to Create a LAN Bridge in pfSense®
In this example we will be assigning the LAN interface to a bridge utilizing the Vaults additional ports, OPT1 and OPT2. The idea of this example can be used across all the Vault models with small variation.
- Access the webGUI. The default IP address: 192.168.1.1, username: admin, password: pfsense
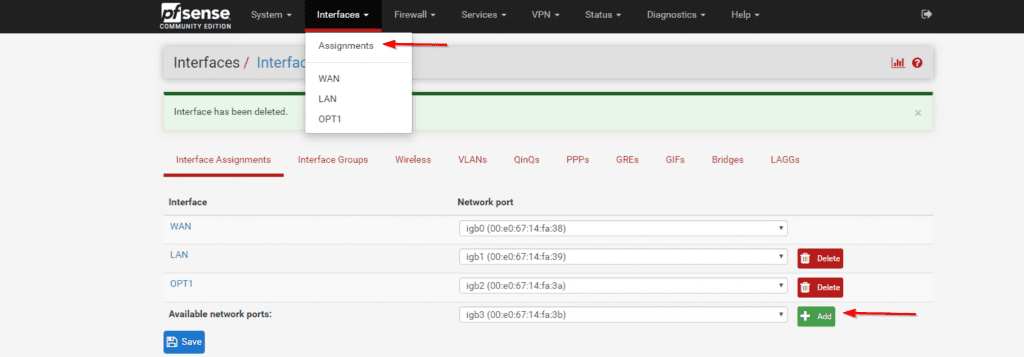
- Verify the Vaults optional interfaces(OPT1, OPT2, etc) are assigned with default settings.
- To assign simply click Add next to the port you wish to assign. Click Save.
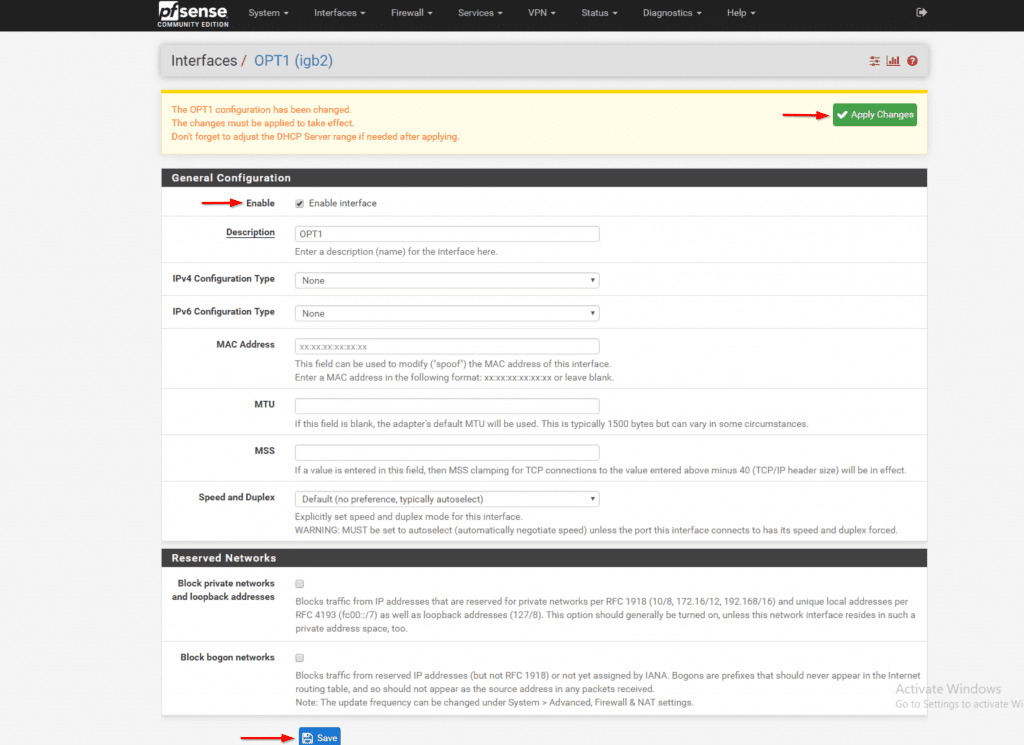
- To enable the each interface, click the on the interface label(OPT1,OPT2,etc) in the left column.
- Click Enable, leave all other settings default. Save and Apply Changes
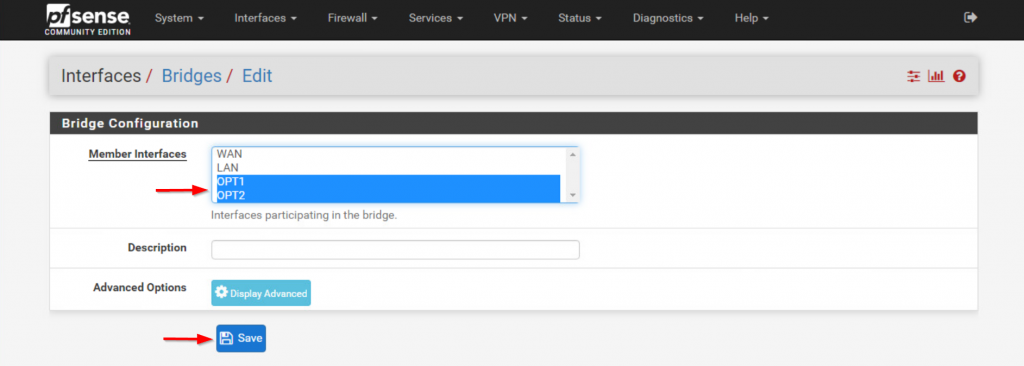
- In the Interfaces menu select the Bridges tab and click Add
- Select OPT1 and OPT2 using Ctrl+Click. Don’t select the LAN interface. Click Save.
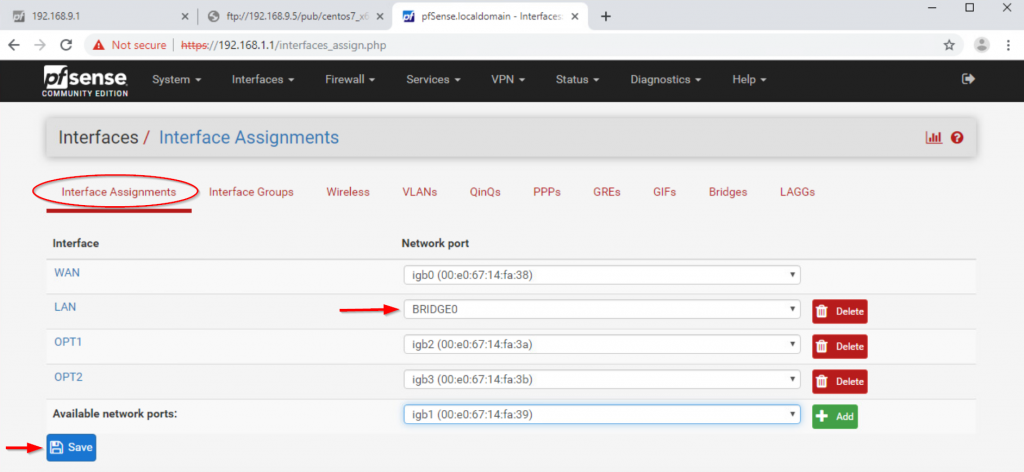
- Navigate back to the Interface Assignments tab and change the LAN interface port to BRDIGE0
- Note: At this point once the settings are saved the web interface connection will be lost. Swap the Ethernet connection to one of the optional ports(OPT1,OPT2) added into the bridge to regain access
- Assign the port previously used as LAN to OPT3 and enable it as done in the steps earlier
- Navigate back to the Bridges menu and add(Ctrl+Click) OPT3. Save
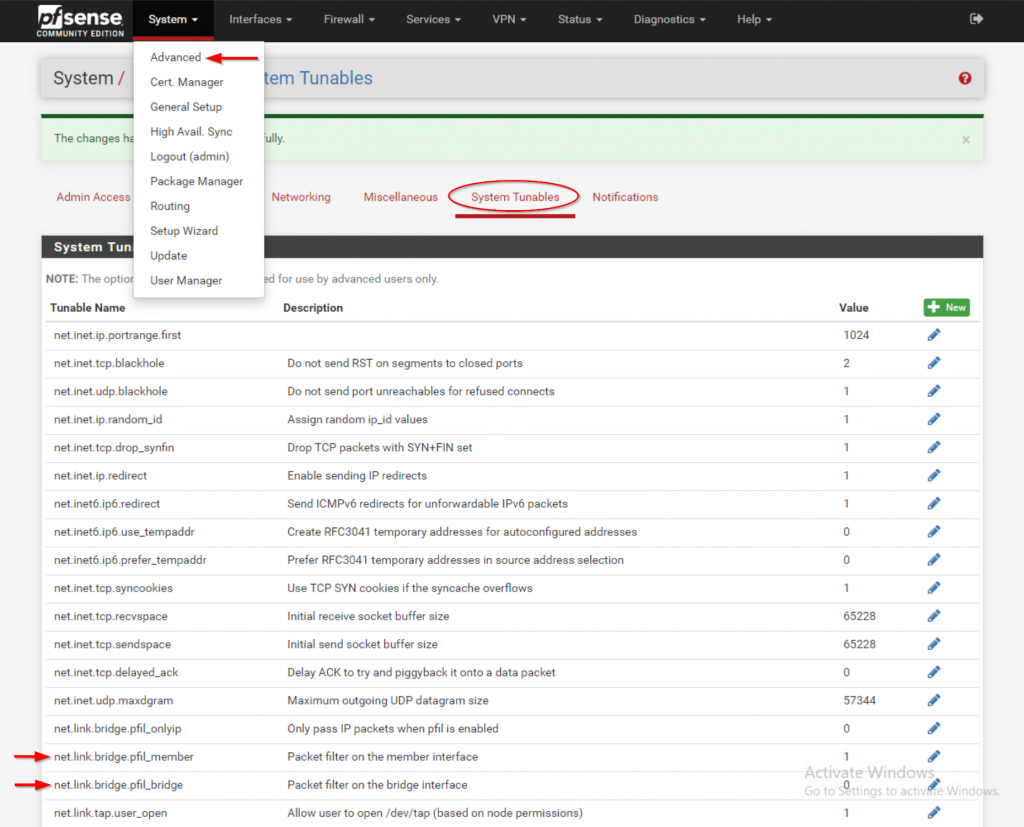
- Navigate to System > Advanced > System Tunables
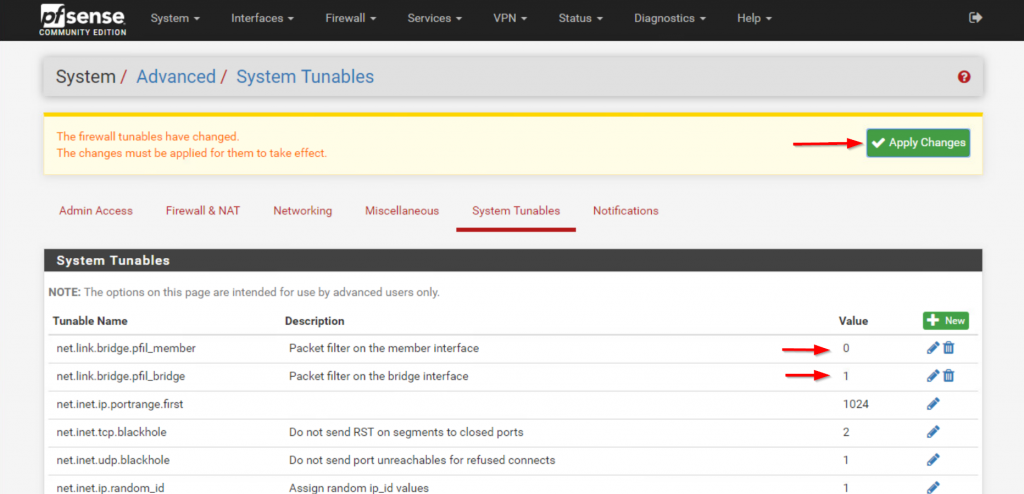
- Select net.link.bridge.pfil_member and change its value to 0. Save
- Select net.link.bridge.pfil_bridge and change its value to 1. Save
- Click Apply Changes at the top
- Reboot
- Verify bridged ports are functioning